> ## Documentation Index
> Fetch the complete documentation index at: https://docs.retellai.com/llms.txt
> Use this file to discover all available pages before exploring further.
# Trigger Retell calls from Notion
> Connect Retell AI to a Notion database to trigger outbound voice agent calls and write call summaries and recordings back to the originating row.
This guide connects **Retell AI** to a Notion database so database automations can start outbound calls. After the call is analyzed, Retell writes the call summary and recording link back to the originating Notion row.
## Before you start
* A Retell account with an API key, configured agent, and outbound phone number
* Access to the target Notion database and permission to authorize integrations and create database automations
* The Retell setup wizard for Notion, supplied by your integration administrator
## Database properties
Use these properties for calling and post-call results. The consent property can use any name you choose — keep it consistent between the database and the setup wizard.
| Property | Type | Purpose |
| -------------------------- | -------------------- | ------------------------------------------ |
| **Name** | Title | Identify the call target |
| **Phone** | Phone number or Text | Store the outbound call number |
| **Call allowed** (example) | Checkbox | Allow calling only when checked |
| **AI Summary** | Rich text | Store the post-call summary |
| **Recording URL** | URL | Store the call recording link |
| **Status** | Select or Text | Optional call status or automation trigger |
## Prepare your database
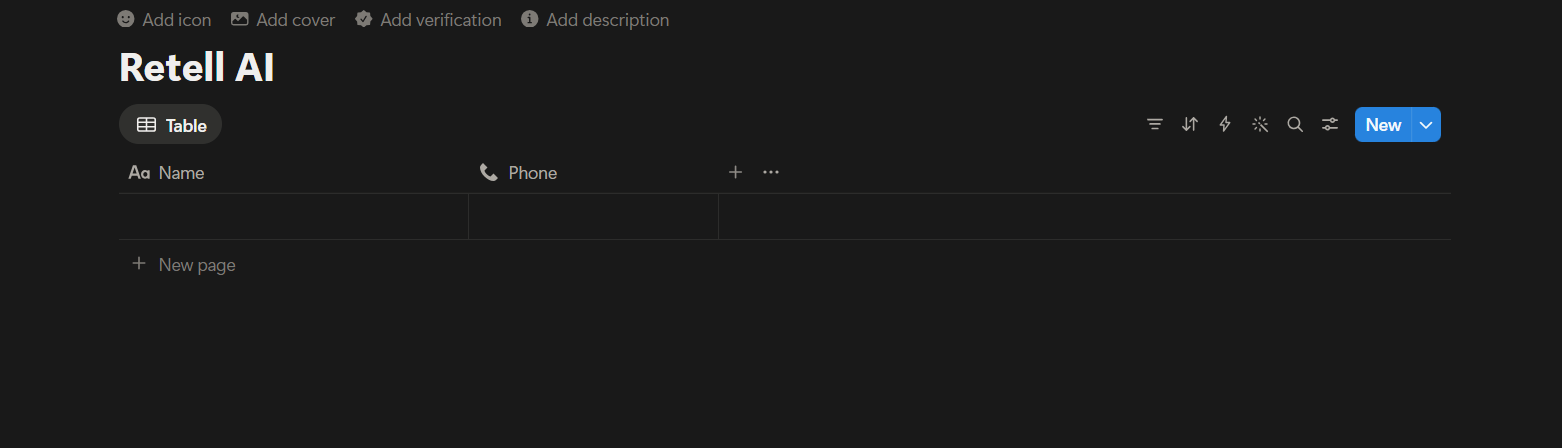
Open or create a Notion database with the properties listed above.
Add phone numbers with a country code, such as `+15551234567`, and add a Checkbox property for call consent. You can name it anything — for example, `Call allowed`.
 ## Connect Retell and Notion
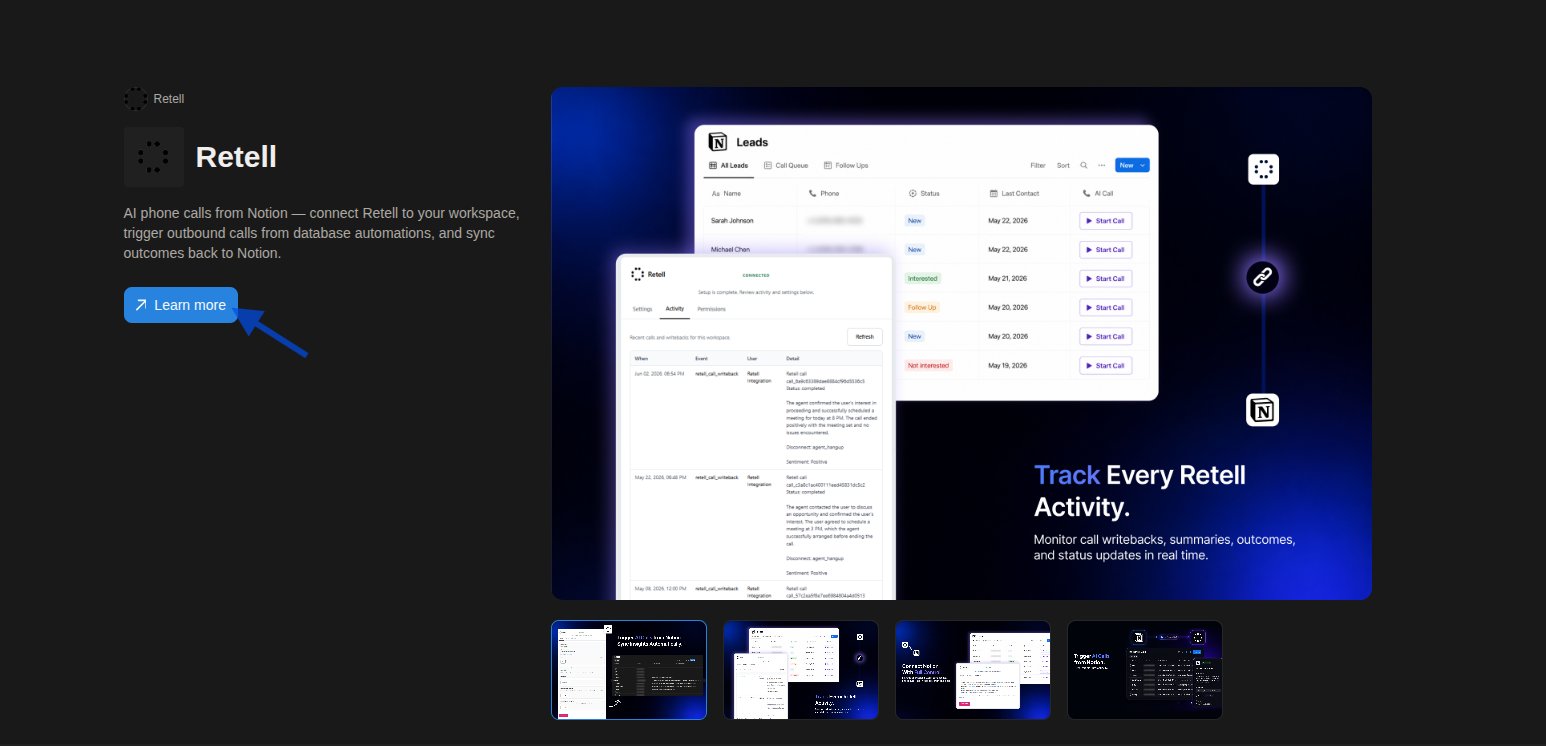
Open the Retell connection and select **Learn more**.
## Connect Retell and Notion
Open the Retell connection and select **Learn more**.
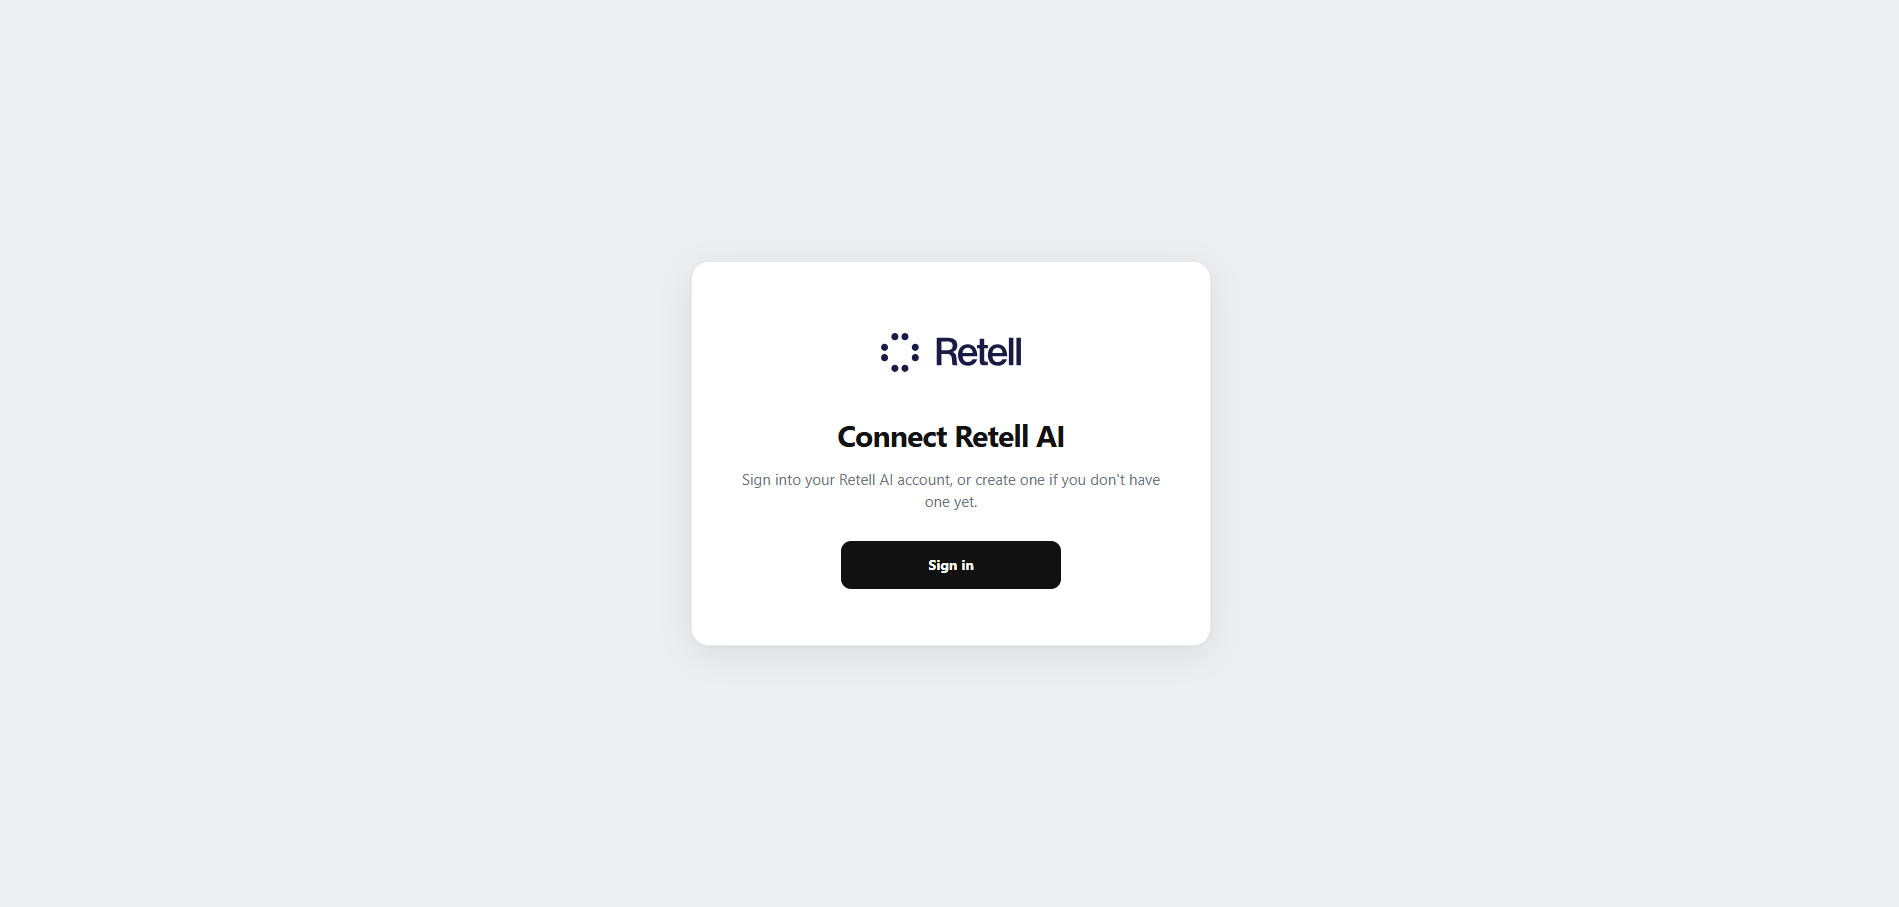
 Open the Retell setup wizard for Notion and select **Sign in**. Use the Retell account you want to connect.
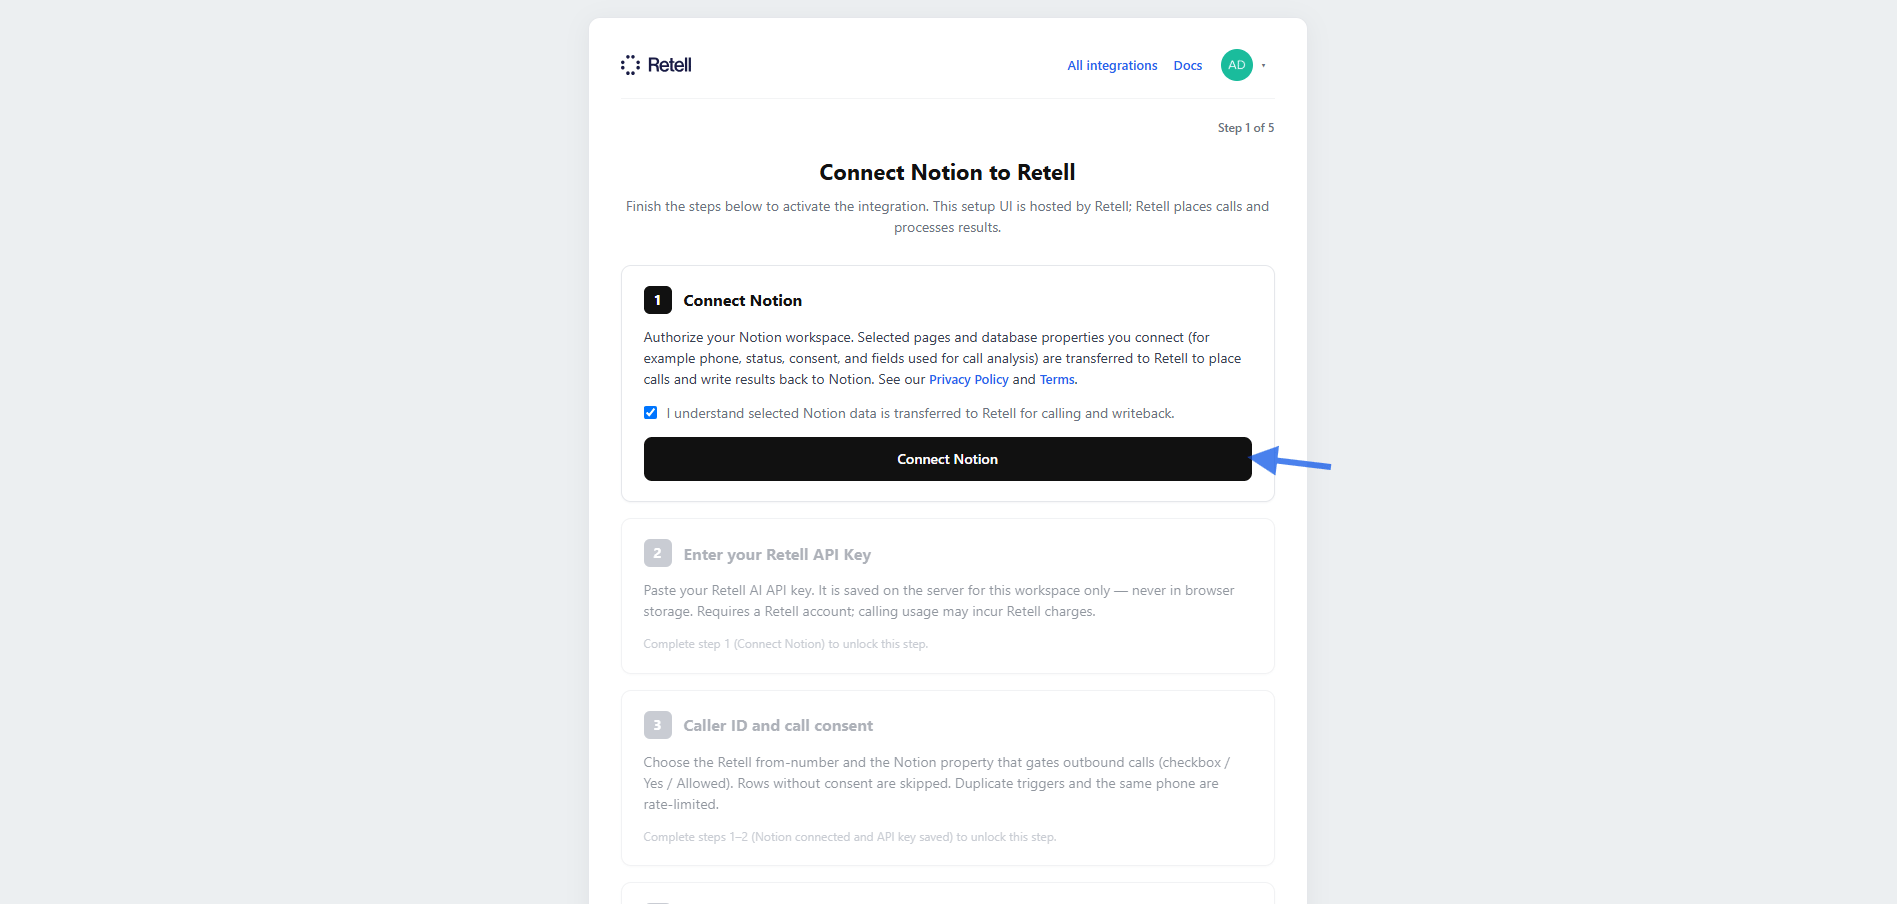
 Review the data transfer notice, select the acknowledgment checkbox, and select **Connect Notion**.
 ## Grant access to your database
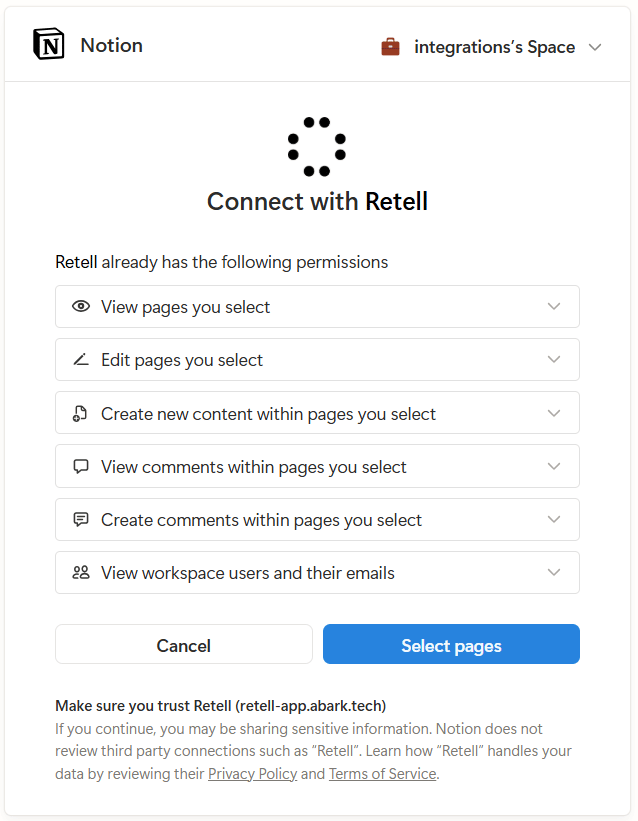
Review the requested Notion permissions and select **Select pages**.
## Grant access to your database
Review the requested Notion permissions and select **Select pages**.
 Choose the page or database containing your call table, then select **Allow access**. Return to the wizard and confirm that Notion shows **Connected**.
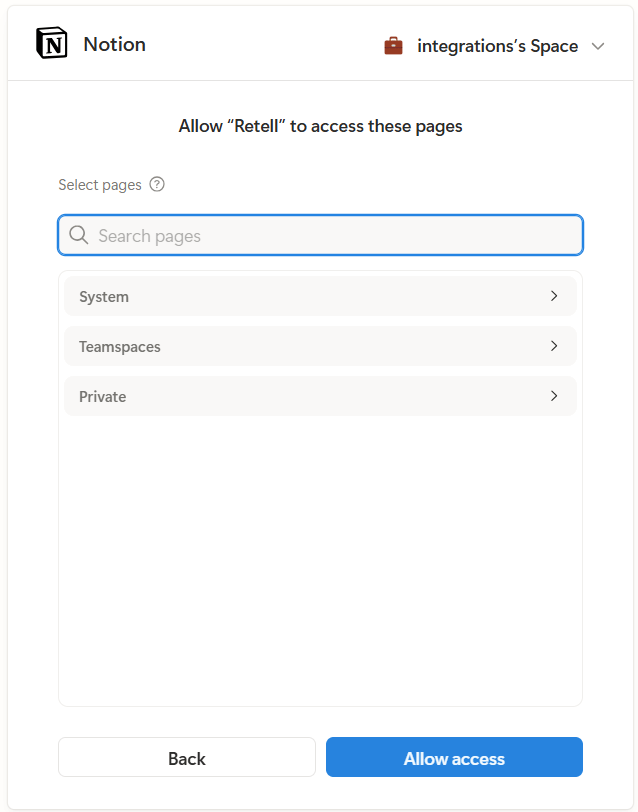 Retell can only read and update the pages you select. Include the target database when granting access.
## Configure calling
In the Retell dashboard, go to **Settings → API Keys**. Copy an existing key or select **Add Key** to create one. Open the key's **⋮** options menu and select **Set as webhook key**, then copy the key value.
Retell can only read and update the pages you select. Include the target database when granting access.
## Configure calling
In the Retell dashboard, go to **Settings → API Keys**. Copy an existing key or select **Add Key** to create one. Open the key's **⋮** options menu and select **Set as webhook key**, then copy the key value.
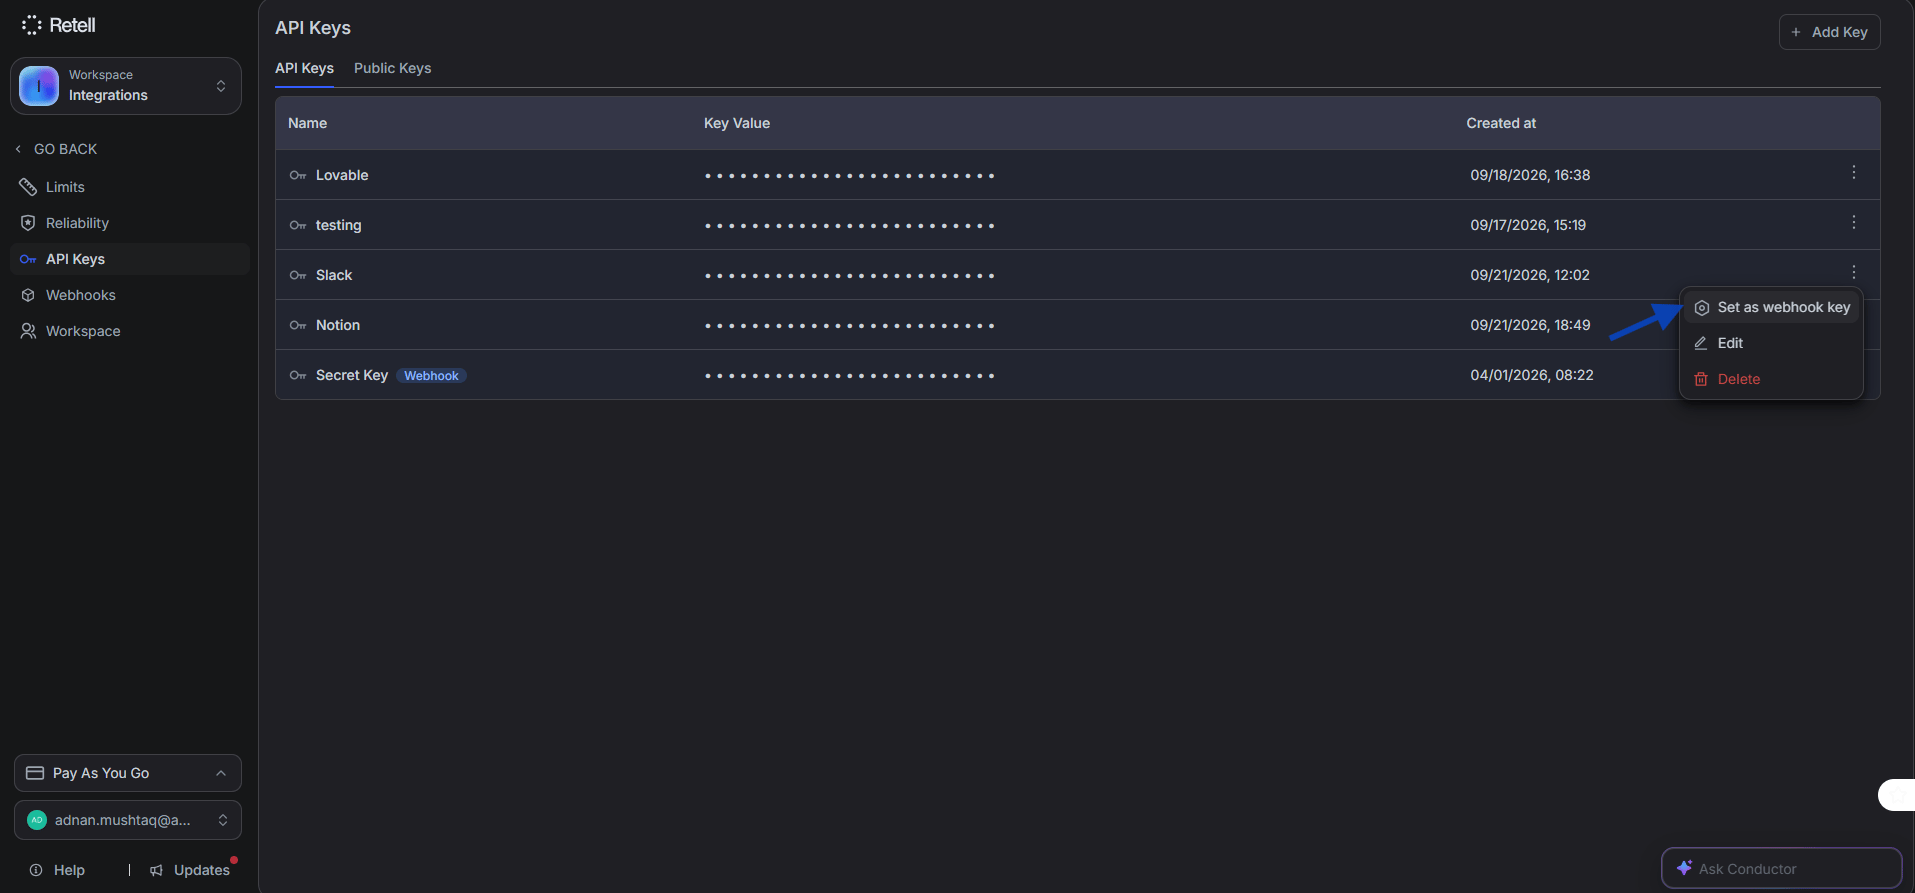 The API key must have the webhook option enabled. Post-call analysis data is only written back to Notion when the key is designated as a webhook key.
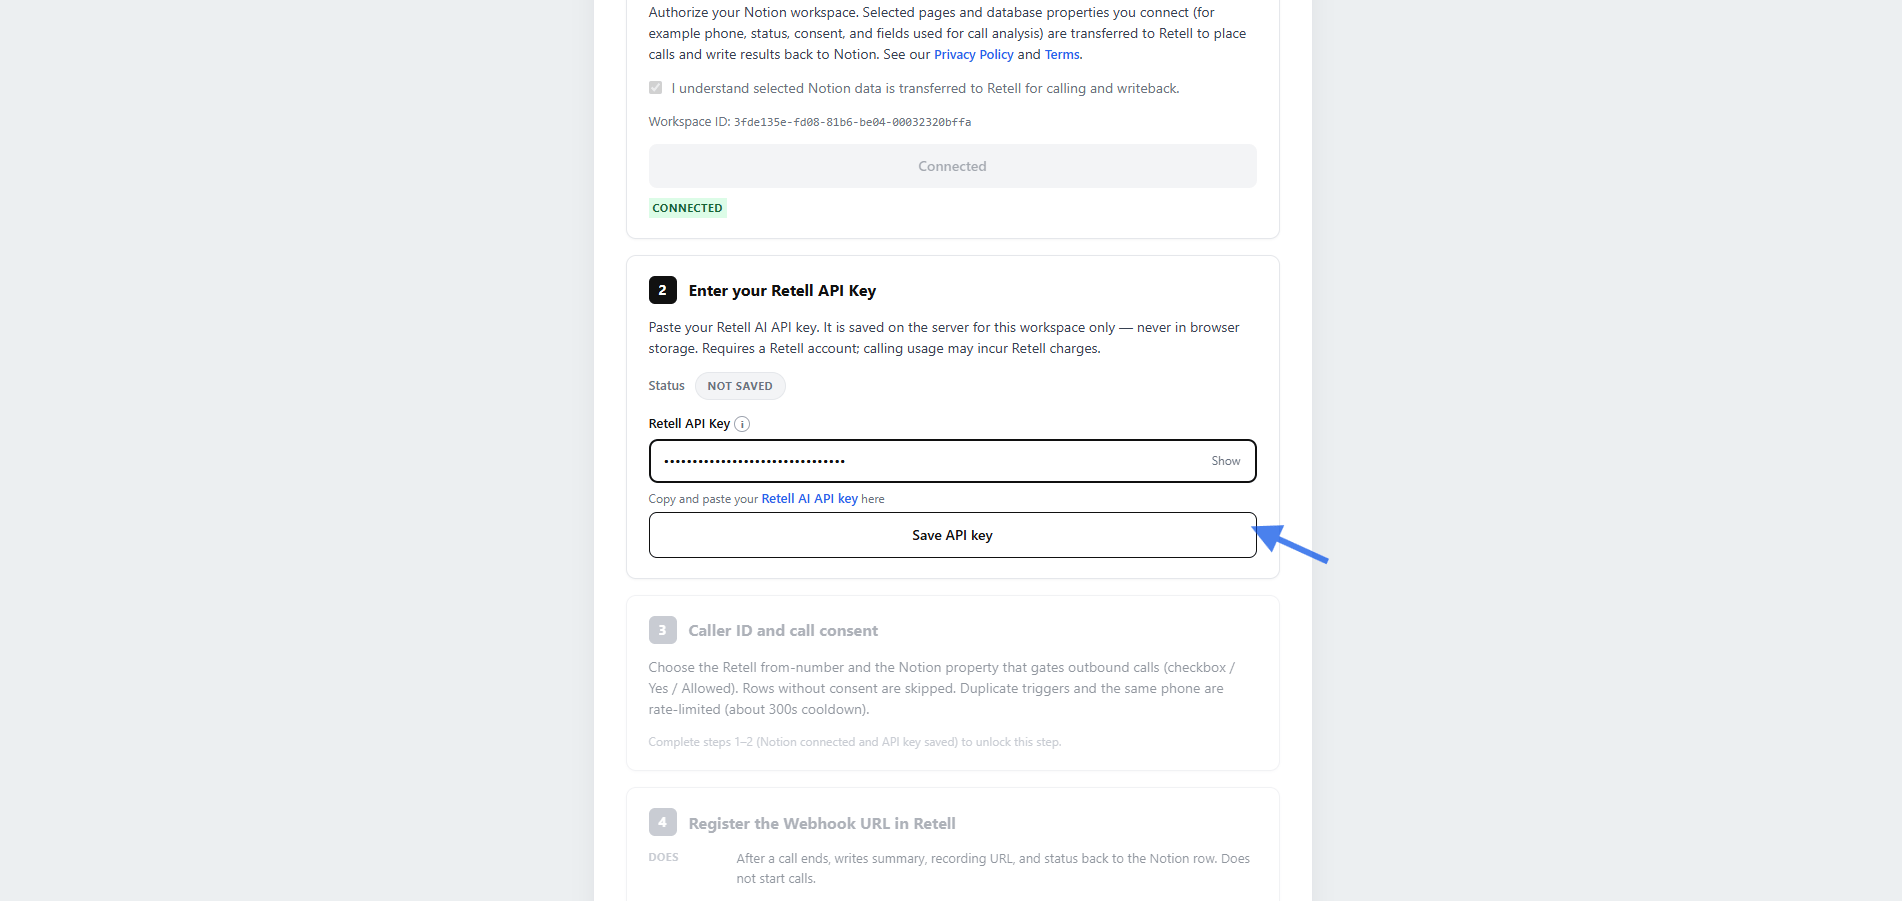
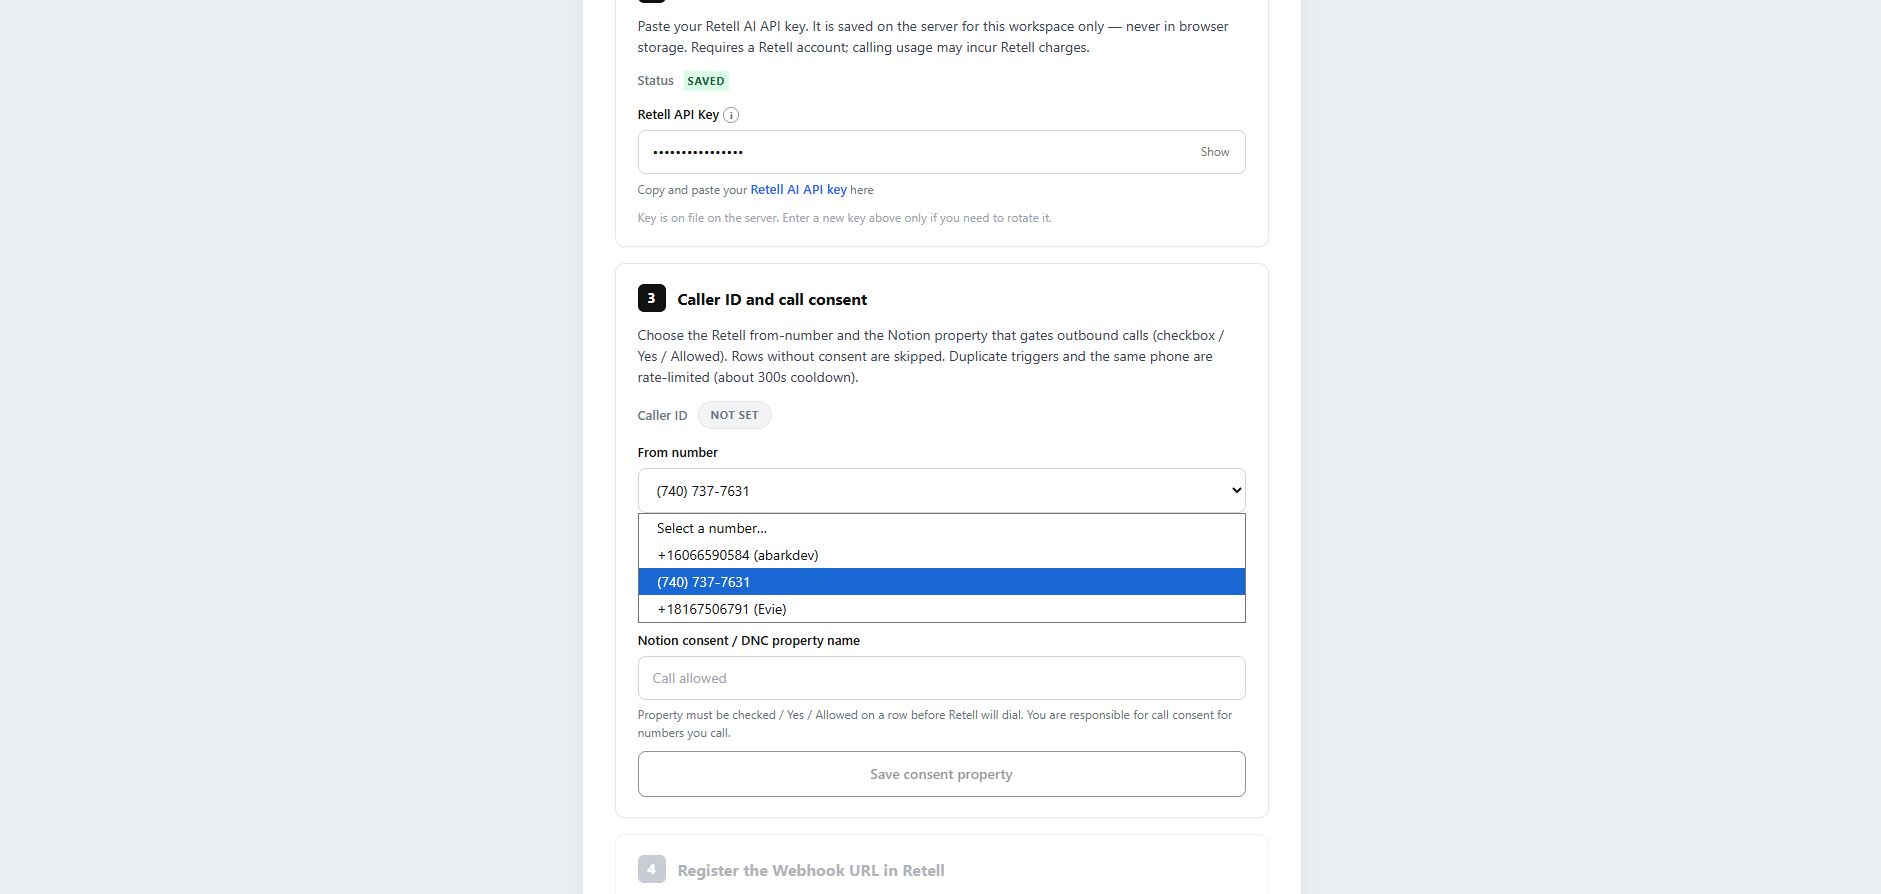
Paste the webhook key into **Retell API Key** and select **Save API key**. Confirm that the status shows **Saved**.
Retell AI supports only one active webhook integration at a time. If you are also using Zoho or Slack, choose which integration receives webhook events.
The API key must have the webhook option enabled. Post-call analysis data is only written back to Notion when the key is designated as a webhook key.
Paste the webhook key into **Retell API Key** and select **Save API key**. Confirm that the status shows **Saved**.
Retell AI supports only one active webhook integration at a time. If you are also using Zoho or Slack, choose which integration receives webhook events.
 Select your outbound number from **From number** and select **Save caller ID**.
 ## Set consent and copy the webhook
Enter the exact name of your Notion consent checkbox property — for example, `Call allowed` — in the consent property field. The name must match the property in your database.
Select **Save consent property**. Check this property only on rows approved for calling; rows without consent are skipped.
## Set consent and copy the webhook
Enter the exact name of your Notion consent checkbox property — for example, `Call allowed` — in the consent property field. The name must match the property in your database.
Select **Save consent property**. Check this property only on rows approved for calling; rows without consent are skipped.
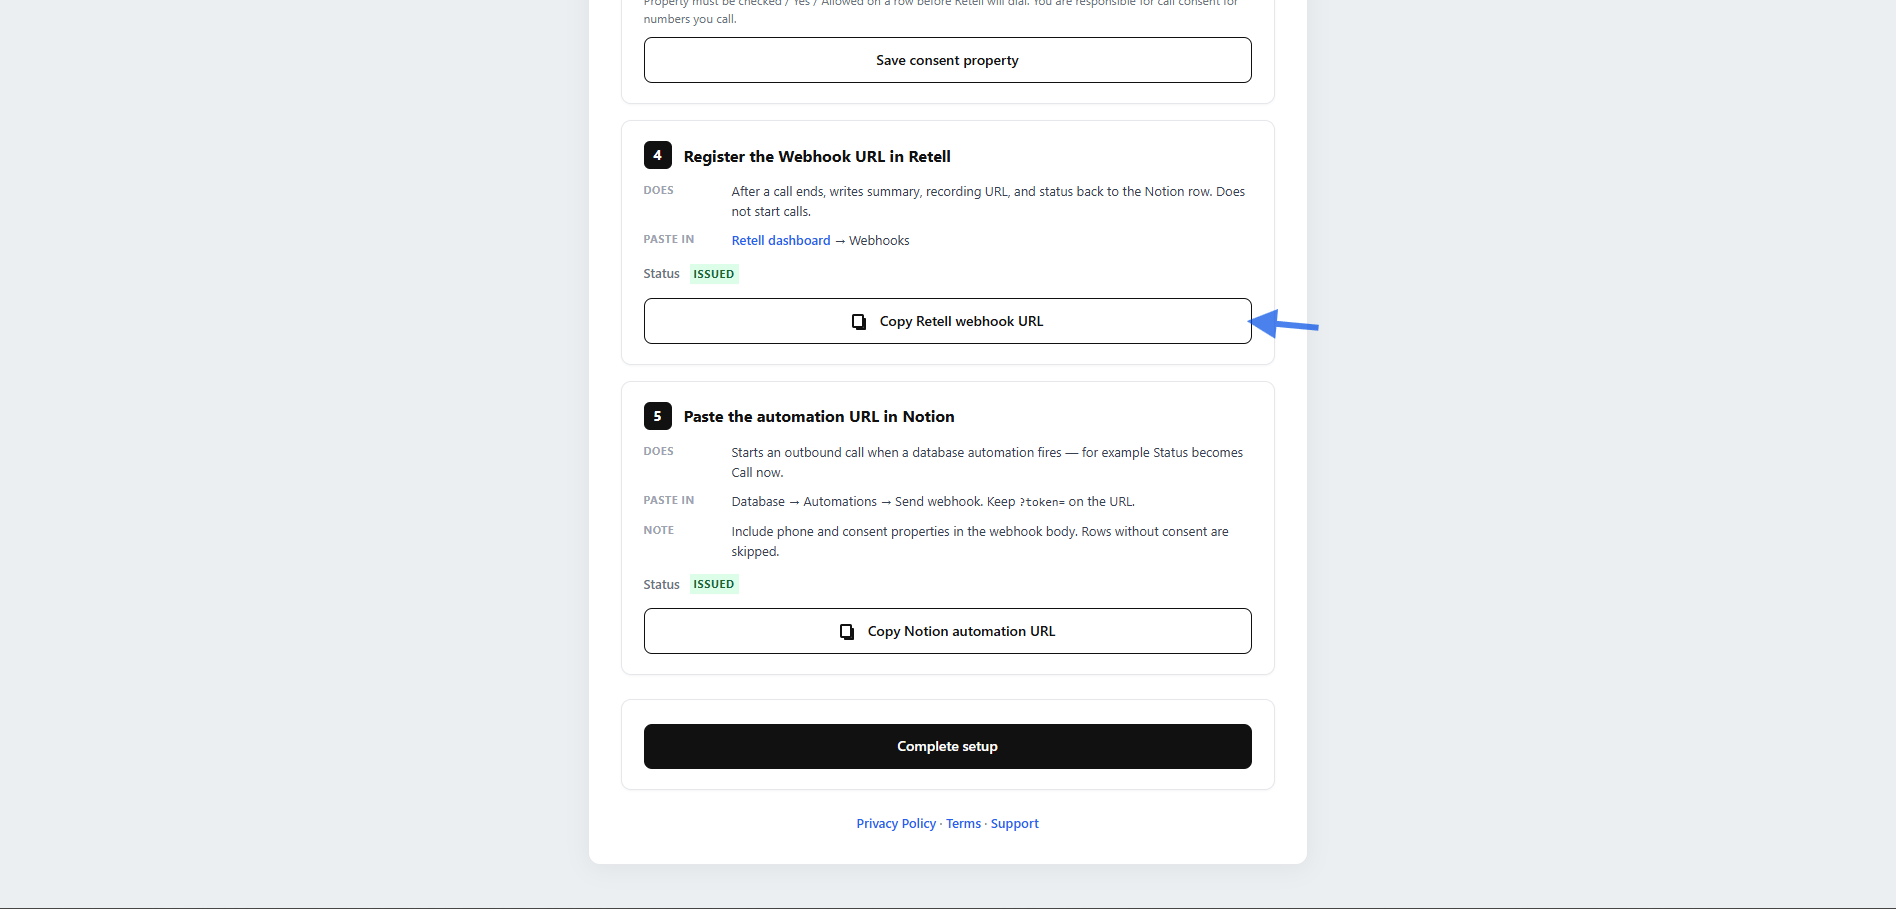
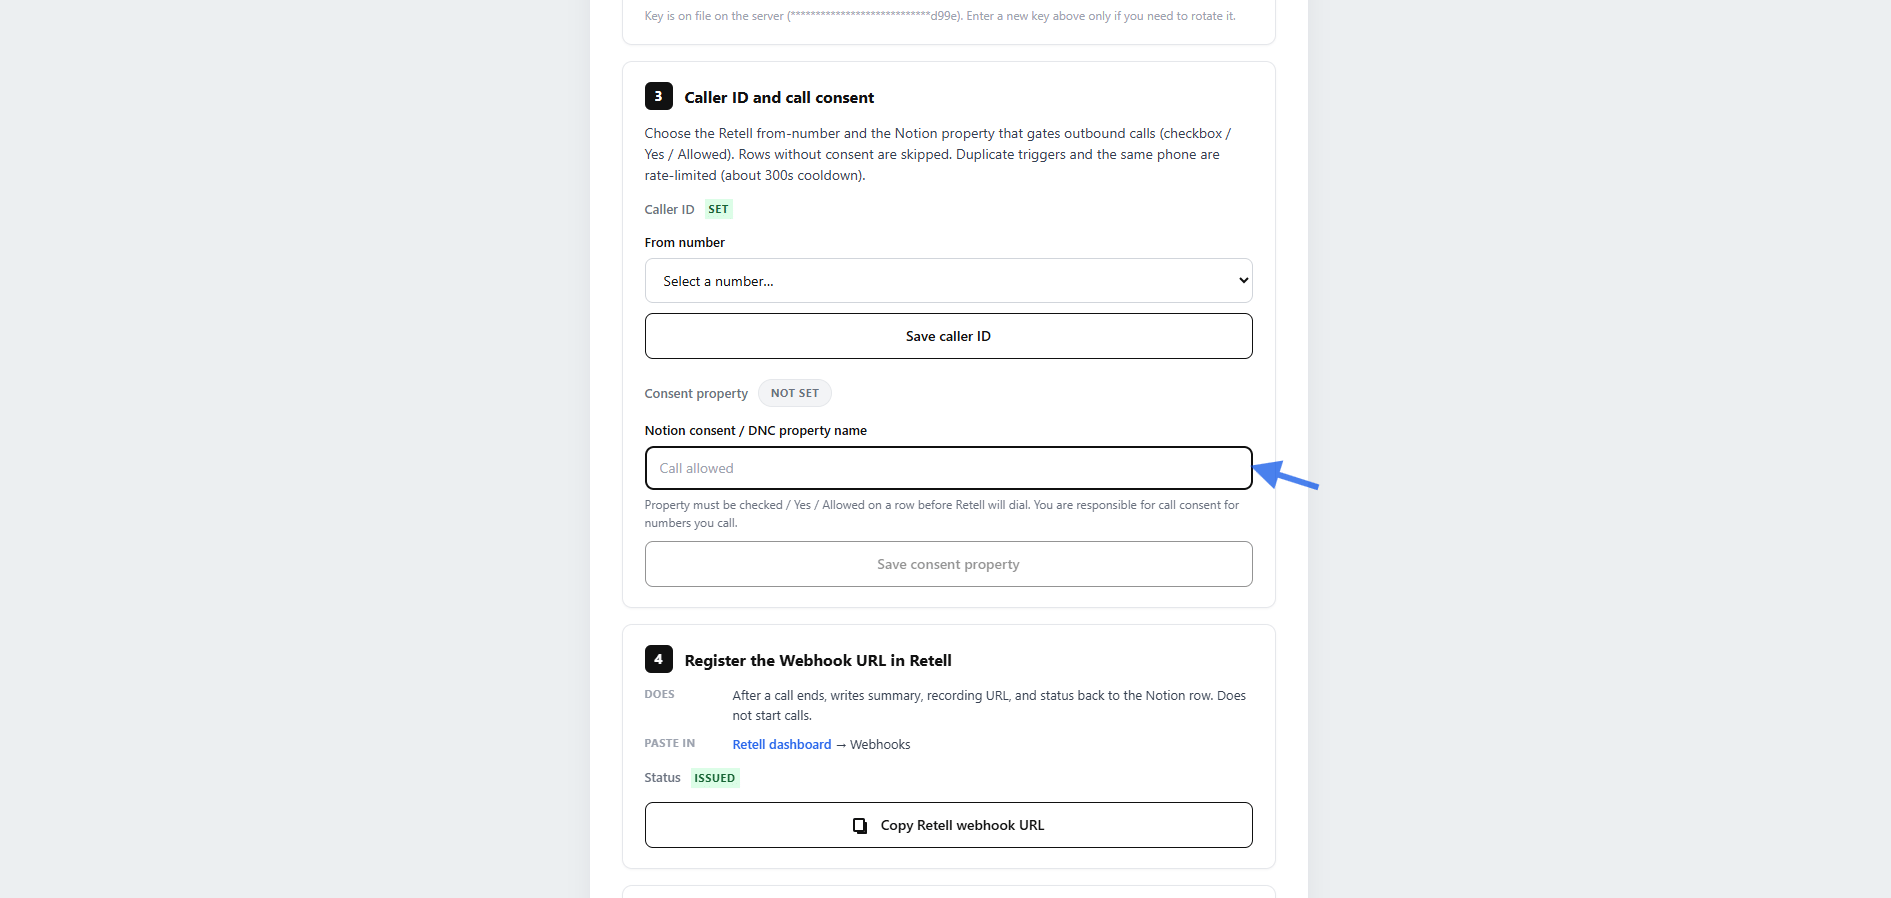 Select **Copy Retell webhook URL**. This URL sends call results back to Notion after the call is analyzed.
 ## Register the webhooks
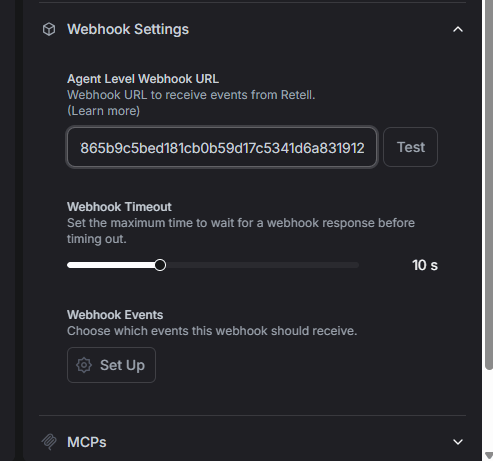
Open the Retell dashboard, go to **Agents**, and select your agent. Expand **Webhook Settings**.
Paste the copied URL into **Agent Level Webhook URL**. Under **Webhook Events**, make sure `call_analyzed` is enabled for post-call analysis.
## Register the webhooks
Open the Retell dashboard, go to **Agents**, and select your agent. Expand **Webhook Settings**.
Paste the copied URL into **Agent Level Webhook URL**. Under **Webhook Events**, make sure `call_analyzed` is enabled for post-call analysis.
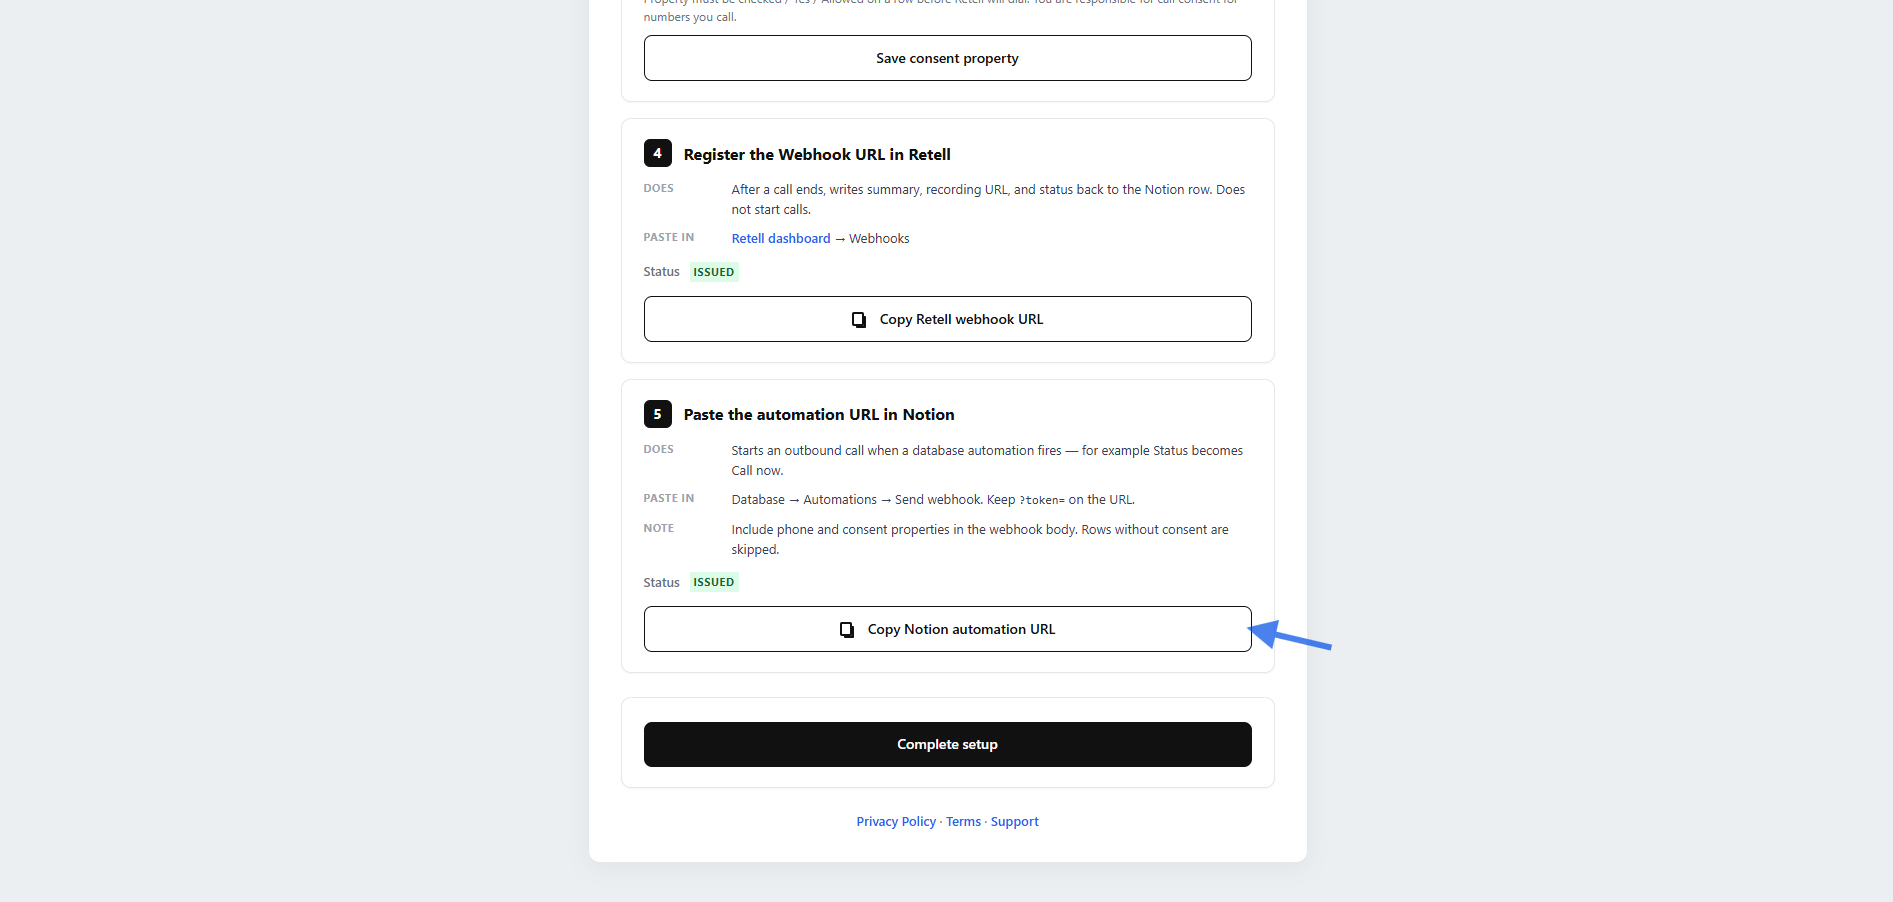
 Return to the setup wizard and select **Copy Notion automation URL**. Use this URL in your Notion automation to start calls.
 ## Create the Notion automation
Open your Notion call database and create a new automation. Name it **Retell Call Agent**.
Add a trigger that matches your workflow. For example, use **Phone is edited** to call whenever a number is added, or **Status becomes Call now** for a status-based setup.
## Create the Notion automation
Open your Notion call database and create a new automation. Name it **Retell Call Agent**.
Add a trigger that matches your workflow. For example, use **Phone is edited** to call whenever a number is added, or **Status becomes Call now** for a status-based setup.
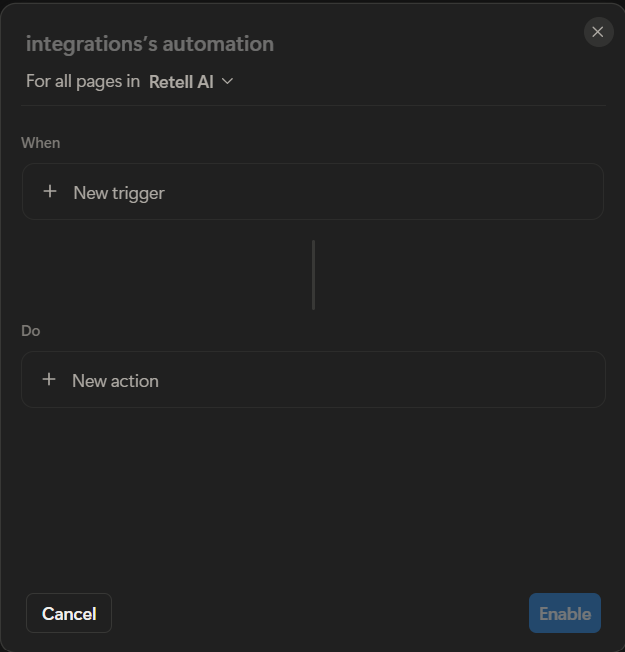 Confirm that the trigger is connected to the intended call database.
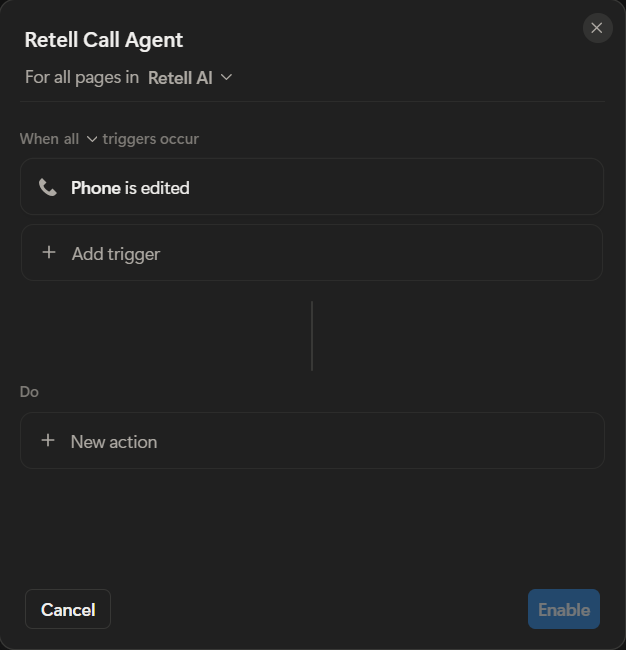 For testing, use a row with your own phone number and check the consent property (for example, **Call allowed**) before triggering the automation.
## Configure the webhook action
Under **Do**, select **New action**, then choose **Send webhook**.
For testing, use a row with your own phone number and check the consent property (for example, **Call allowed**) before triggering the automation.
## Configure the webhook action
Under **Do**, select **New action**, then choose **Send webhook**.
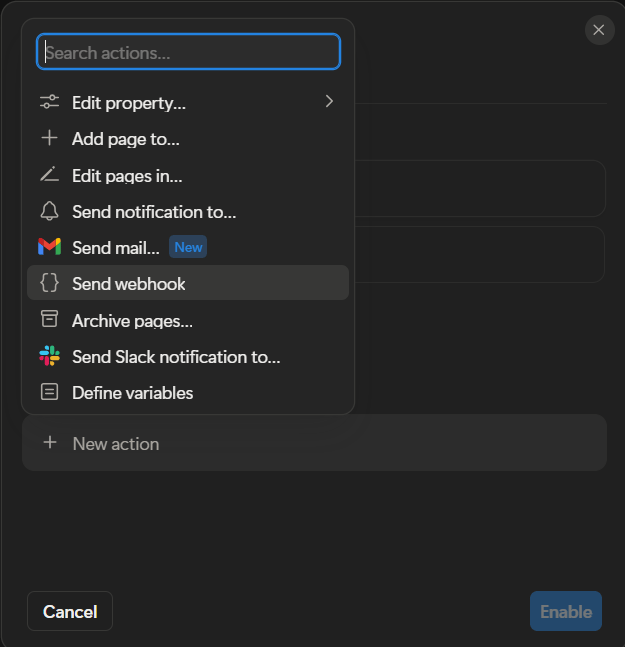 Paste the Notion automation URL into the URL field.
Under **Content**, select all existing properties, including **Phone** and your consent property. Select **Done**, then enable the automation.
Paste the Notion automation URL into the URL field.
Under **Content**, select all existing properties, including **Phone** and your consent property. Select **Done**, then enable the automation.
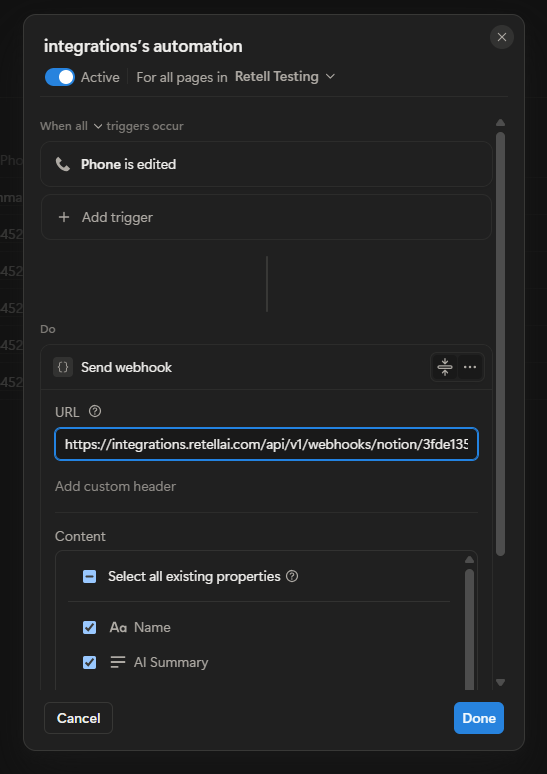 Confirm that the webhook action includes the required database properties, then select **Done** and enable the automation.
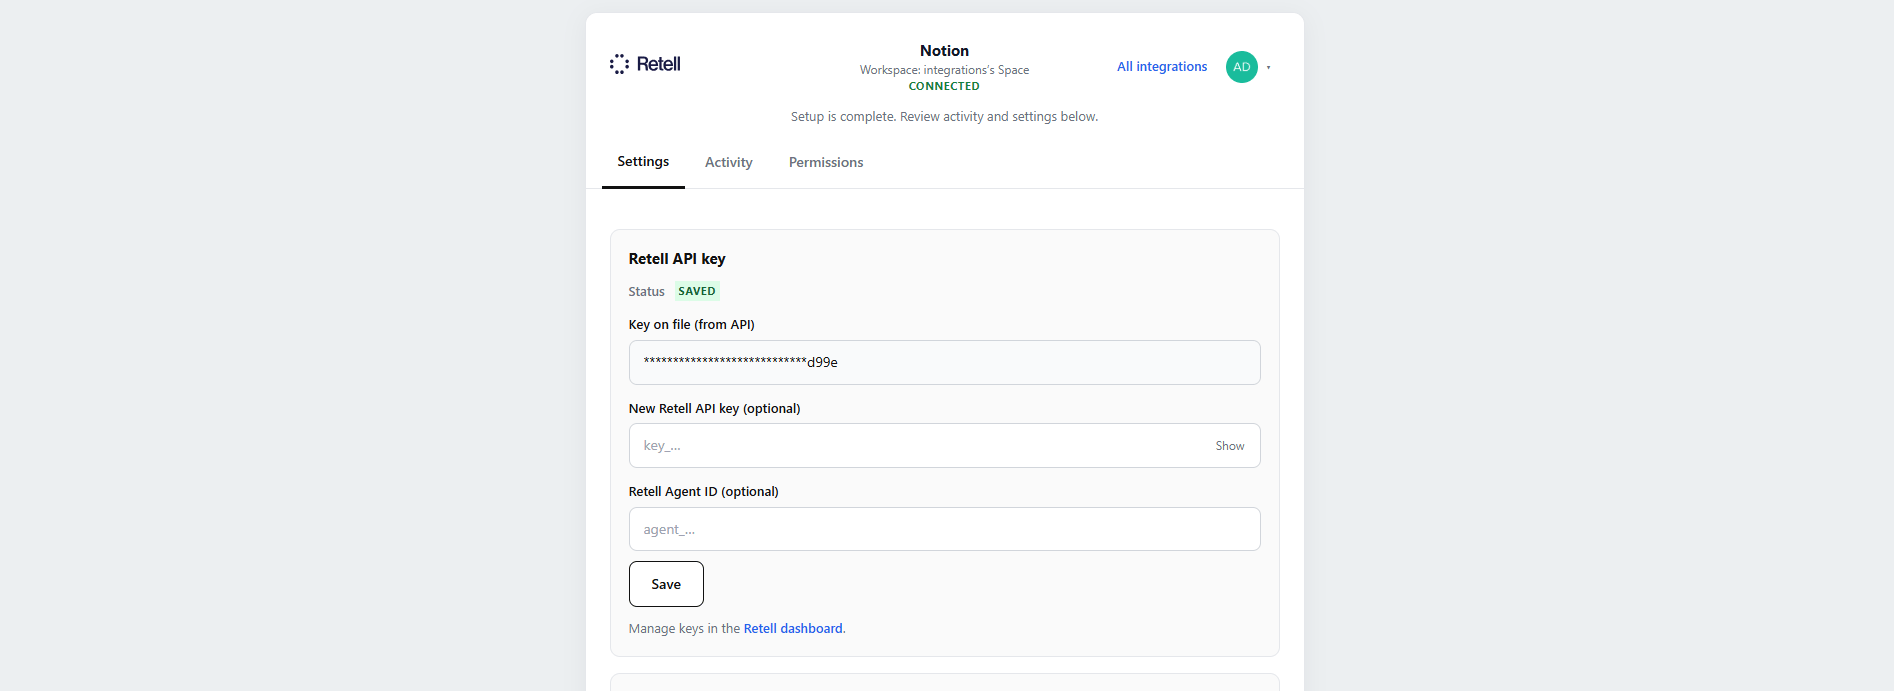 ## Complete setup and test
Return to the wizard and select **Complete setup**. Confirm that the integration status shows **Connected**.
Add a test row with your own valid phone number and check the consent property (for example, **Call allowed**).
Trigger the automation by performing the action you configured — for example, editing the **Phone** field or changing the **Status** value. Answer the call and wait for analysis to finish.
## Verify call activity
In your Notion database, open the test row and confirm that **AI Summary** and **Recording URL** are populated. Status and other analysis fields may also update, depending on your configuration.
## Complete setup and test
Return to the wizard and select **Complete setup**. Confirm that the integration status shows **Connected**.
Add a test row with your own valid phone number and check the consent property (for example, **Call allowed**).
Trigger the automation by performing the action you configured — for example, editing the **Phone** field or changing the **Status** value. Answer the call and wait for analysis to finish.
## Verify call activity
In your Notion database, open the test row and confirm that **AI Summary** and **Recording URL** are populated. Status and other analysis fields may also update, depending on your configuration.
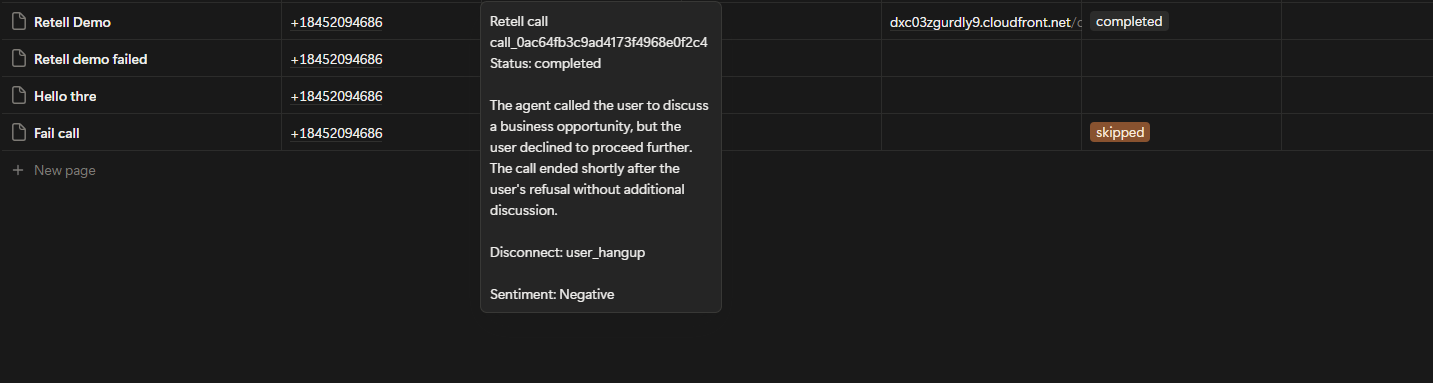 You can also open the integration dashboard and select **Activity**. Confirm that a `retell_call_writeback` event appears for the test call. Review its call ID, status, summary, disconnect reason, and sentiment.
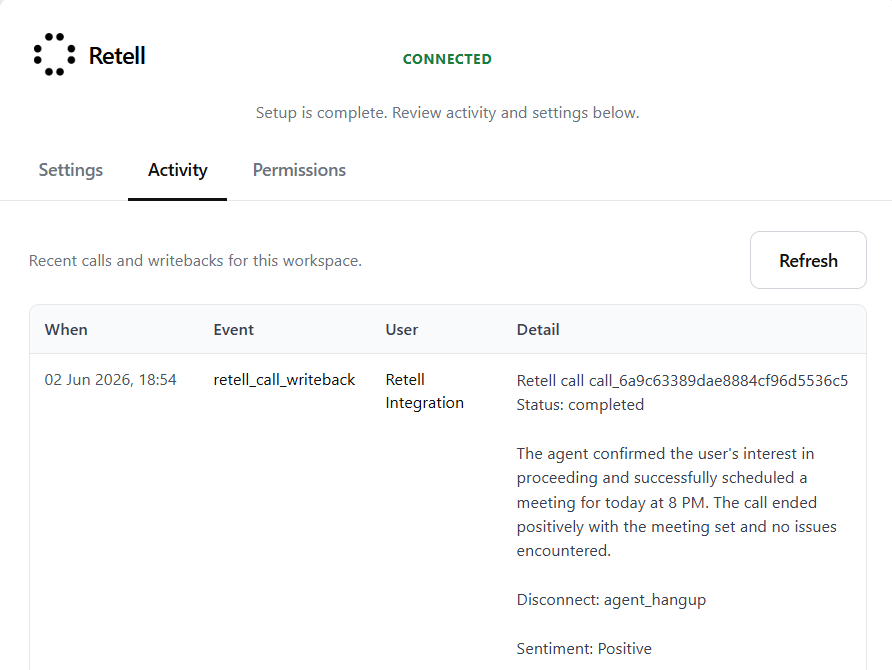 ## Setup validation
* Notion is connected and the correct database is shared with Retell.
* The API key, caller ID, consent property, and intended agent are configured.
* The Retell webhook is registered and the Notion automation is enabled.
* A test call completes and results appear on the originating Notion row.
## Troubleshooting
| Problem | Resolution |
| ------------------------------------ | ------------------------------------------------------------------------------------------------------------------------------------------------------ |
| Notion does not connect | Reconnect and select the target database. If authorization still fails, ask your administrator to check the OAuth redirect URI. |
| Retell cannot read a row | Confirm the database was selected during authorization and the integration has access to it. |
| Retell cannot access your database | In Notion, open **Connections**, select Retell under **Active connections**, and verify your call database is included. Grant access if it is missing. |
| The automation does not start a call | Check that the automation is enabled, the trigger was met, the consent property is checked, and **Send webhook** uses the Notion automation URL. |
| The Notion webhook fails | Copy the automation URL again and include **Phone** and the consent property in the payload. |
| No summary or recording link appears | Confirm the agent has the Retell webhook URL and `call_analyzed` is enabled. Review **Activity** and ask your administrator to check integration logs. |
| The phone number is rejected | Use a valid number with a leading plus and country code, such as `+15551234567`. |
| Results reach the wrong row | Check the selected database and automation payload. Confirm the automation belongs to the intended database. |
| The wrong caller ID or agent is used | Review the outbound caller ID and agent in the integration settings. |
## Setup validation
* Notion is connected and the correct database is shared with Retell.
* The API key, caller ID, consent property, and intended agent are configured.
* The Retell webhook is registered and the Notion automation is enabled.
* A test call completes and results appear on the originating Notion row.
## Troubleshooting
| Problem | Resolution |
| ------------------------------------ | ------------------------------------------------------------------------------------------------------------------------------------------------------ |
| Notion does not connect | Reconnect and select the target database. If authorization still fails, ask your administrator to check the OAuth redirect URI. |
| Retell cannot read a row | Confirm the database was selected during authorization and the integration has access to it. |
| Retell cannot access your database | In Notion, open **Connections**, select Retell under **Active connections**, and verify your call database is included. Grant access if it is missing. |
| The automation does not start a call | Check that the automation is enabled, the trigger was met, the consent property is checked, and **Send webhook** uses the Notion automation URL. |
| The Notion webhook fails | Copy the automation URL again and include **Phone** and the consent property in the payload. |
| No summary or recording link appears | Confirm the agent has the Retell webhook URL and `call_analyzed` is enabled. Review **Activity** and ask your administrator to check integration logs. |
| The phone number is rejected | Use a valid number with a leading plus and country code, such as `+15551234567`. |
| Results reach the wrong row | Check the selected database and automation payload. Confirm the automation belongs to the intended database. |
| The wrong caller ID or agent is used | Review the outbound caller ID and agent in the integration settings. |